Paying Google every month for one address on your own domain? That is what Google Workspace charges for, per user, forever. Mailflare is an open source repo (AGPL-3.0, 6,176 stars on GitHub today) that replaces it: inbox, calendar, booking page and drive, running in your own Cloudflare account.
One prompt to Claude Code. [email protected]. No per-user fee.
One honest thing first. It is free for one person, not free of everything. You still pay for the domain, and shared team inboxes like support@ need a paid licence. The cost section below has the exact numbers.
// Build this with your AI agent
Build this with your AI agent
Want to try this? Copy the setup prompt into Claude Code, Codex or Cursor. The first line points at this guide. The rest is the maker's own "Deploy with an AI agent" prompt from the README, word for word.
Read this guide first: https://codewithnishant.dev/free/free-custom-domain-email/
It has the token permissions and the DNS and Gmail steps. Then run the maker's prompt below, from the README at https://github.com/hieunc229/mailflare (Deploy with an AI agent).

Install Mailflare for me from https://github.com/hieunc229/mailflare on my Cloudflare account.

1. Read README.md, docs/deployment.md and wrangler.jsonc first.
2. Ask me for my Cloudflare account ID and two API tokens, using a secret input:
   a deploy token (for Wrangler) and a runtime token (the Worker secret CF_TOKEN).
   Never print them, commit them, or pass them as command arguments.
3. Keep the Worker name exactly "mailflare". Create or reuse the D1 database
   "mailflare", the R2 bucket "mailflare-raw", and the queues "mailflare-inbound",
   "mailflare-outbound" and "mailflare-agent".
4. Install dependencies, run `npm run deploy`, and set CF_TOKEN as a Worker secret.
   Do not run remote database migrations yourself. The /setup page does that.
5. Give me the app URL and anything I still need to do. I will open /setup, create
   the admin account and connect my domain.
01. The whole setup in 8 steps
The short answer: make two Cloudflare API tokens, paste the prompt into Claude Code, open /setup, connect your domain, check the four DNS records, import your old Gmail, then switch your mail over.
| # | Step | Where | You need |
|---|---|---|---|
| 1 | Find your account ID, make 2 API tokens | Cloudflare dashboard | A Cloudflare account |
| 2 | Paste the prompt into Claude Code | Your terminal | Claude Code, Node.js, the tokens |
| 3 | Open /setup, make the admin account | Your new app URL | A browser |
| 4 | Connect your domain, create hello@ | Admin, Domains, then Mailboxes | A domain on Cloudflare DNS |
| 5 | Check MX, SPF, DKIM, DMARC | Admin, Domains | Four green rows |
| 6 | Pick how you send | Domains, Setup sending email | A Resend key (free) or the Cloudflare paid plan |
| 7 | Import your old Gmail | Settings, Import | A Google Takeout file or an app password |
| 8 | Send a test, then switch your mail over | Inbox | A Gmail address to test with |
02. What it costs, and the catch
The repo's Cost section says you can receive and send mail for free. Here is what sits behind that line.
| Part | Free route | What to know |
|---|---|---|
| Receiving mail | Cloudflare Email Routing, free | Your domain's DNS must be on Cloudflare. |
| Sending mail | Resend free tier, 3,000 emails a month | Resend's pricing page also lists a daily limit of 100 emails and 3 custom domains on the free plan (checked 14 November). |
| Sending, other options | Amazon SES, or Cloudflare's own sending | Cloudflare sending needs the $5 a month Workers paid plan, per the README. New SES accounts start in a sandbox until AWS approves them. |
| The domain | Not free | You pay your registrar. It can be registered anywhere, as long as its DNS runs on Cloudflare. |
| Team and shared inboxes | Paid licence | Solo use is free. The Team licence is $249 one time, with unlimited users and shared mailboxes, per mailflare.co. |
Mailflare also runs on Cloudflare Workers, D1, R2 and Queues, which have their own free limits. Check Cloudflare's pricing against how much mail you handle.
Clips marked "From the reel" are my rebuilt mock-ups with a stand-in brand, not the real app. Screenshots marked "Screen: Mailflare repo" are the repo's official ones.
03. Tokens: your Cloudflare account ID and two API tokens
Step 1 in the table
The prompt asks for three things: your Cloudflare account ID and two separate API tokens. Both tokens are made in the Cloudflare dashboard, and you paste them only into the agent's secret input.
Rule one: never paste a token into a chat message, a repo or a file you commit. The prompt tells the agent the same. Cloudflare shows a token secret once, so copy it straight into your password manager or the agent's secret prompt.
Your account ID
- Open the Cloudflare dashboard and go to Workers & Pages.
- Find Account Details and press the copy button next to Account ID.
Cloudflare's own page covers the other way: find account and zone IDs.
How to create a token
- In Cloudflare, go to Manage Account, then API Tokens (account tokens) or My Profile, then API Tokens (user tokens). The Mailflare docs name Account API Tokens.
- Select Create Token, name it, and start from scratch.
- Add the permissions from the table below, then Continue to summary and Create Token.
- Copy the secret. It is shown once. Steps are on Cloudflare's create API token page.
The two tokens
| Token | What it is for | Permissions |
|---|---|---|
| 1. Deploy token | Wrangler, Cloudflare's deploy tool, uses it as CLOUDFLARE_API_TOKEN to put the app on your account. Scope it to your account. | Workers Scripts Edit (or Workers Admin if you see Cloudflare's newer roles), D1 Edit, Workers R2 Storage Edit, Queues Edit, Account Settings Read. Add Workers Routes Edit for your zone only if the agent should attach a custom domain. |
| 2. Runtime token | Stored as the Worker secret CF_TOKEN. The running app uses it to set up your domain's DNS and Email Routing. It must cover every domain you will connect, and belong to the same Cloudflare account. | For your domains: DNS Edit, Zone Read, Zone Settings Edit, Email Routing Rules Edit. To send through Cloudflare, add a second policy on the whole account: Email Sending Edit. |
Those scopes come from the repo's deployment guide. The README has a shorter token box with a slightly different list. The deployment guide is the newer page, so I follow it. If Email Routing setup later fails with Cloudflare error 10000, the token is missing a permission (see "If something breaks").
- Paste only the token secret. Do not add the word
Bearerand do not use the token ID. - Two tokens on purpose. The deploy token never reaches the running app. Keep the runtime token as narrow as you can.
- Resend instead of Cloudflare sending? Skip the Email Sending permission. You add a Resend key later in the app (see section 06).
04. Install: paste the prompt into Claude Code
Step 2 in the table
- Open a terminal in an empty folder and start Claude Code.
- Paste the prompt from the block at the top of this page.
- When the agent asks, give it your account ID and the two tokens through its secret input.
- Approve its steps as it goes, and read what it runs.
According to the prompt, the agent reads the README, docs/deployment.md and wrangler.jsonc first. Then it keeps the Worker name exactly mailflare, creates or reuses a D1 database called mailflare, an R2 bucket mailflare-raw and three queues (mailflare-inbound, mailflare-outbound, mailflare-agent), installs dependencies, runs npm run deploy, and sets CF_TOKEN as a Worker secret. It does not run database migrations. Your /setup page does that.
One more thing the prompt does not say out loud: keep the name mailflare. The README warns that renaming the app breaks it.
Other ways to deploy
- Deploy to Cloudflare button. The README has a one-click button. Set the app name to
mailflare, and add your runtime token asCF_TOKENwhen Cloudflare asks. The deploy flow does not hand its own token to the running app, so the separateCF_TOKENis still needed, per the troubleshooting page. - Manual.
npm installthennpm run deploy:local, after setting the bindings inwrangler.jsonc. - Docker. See section 09.
05. Connect your domain and make hello@
Steps 3 and 4 in the table
- Open your app's URL (the agent gives it to you) and go to
/setup. It checks your Cloudflare setup, prepares the empty database and asks you to create the first admin account. - Enter a domain that already uses Cloudflare DNS on the same account as your
CF_TOKEN. - Mailflare turns on Email Routing and writes the DNS it needs. If the domain still has another provider's MX records, it shows them and waits for your yes. Read the next section before you confirm.
- Choose the address for your first mailbox, for example
[email protected], and finish. - Open the inbox and send a test message to the new address.
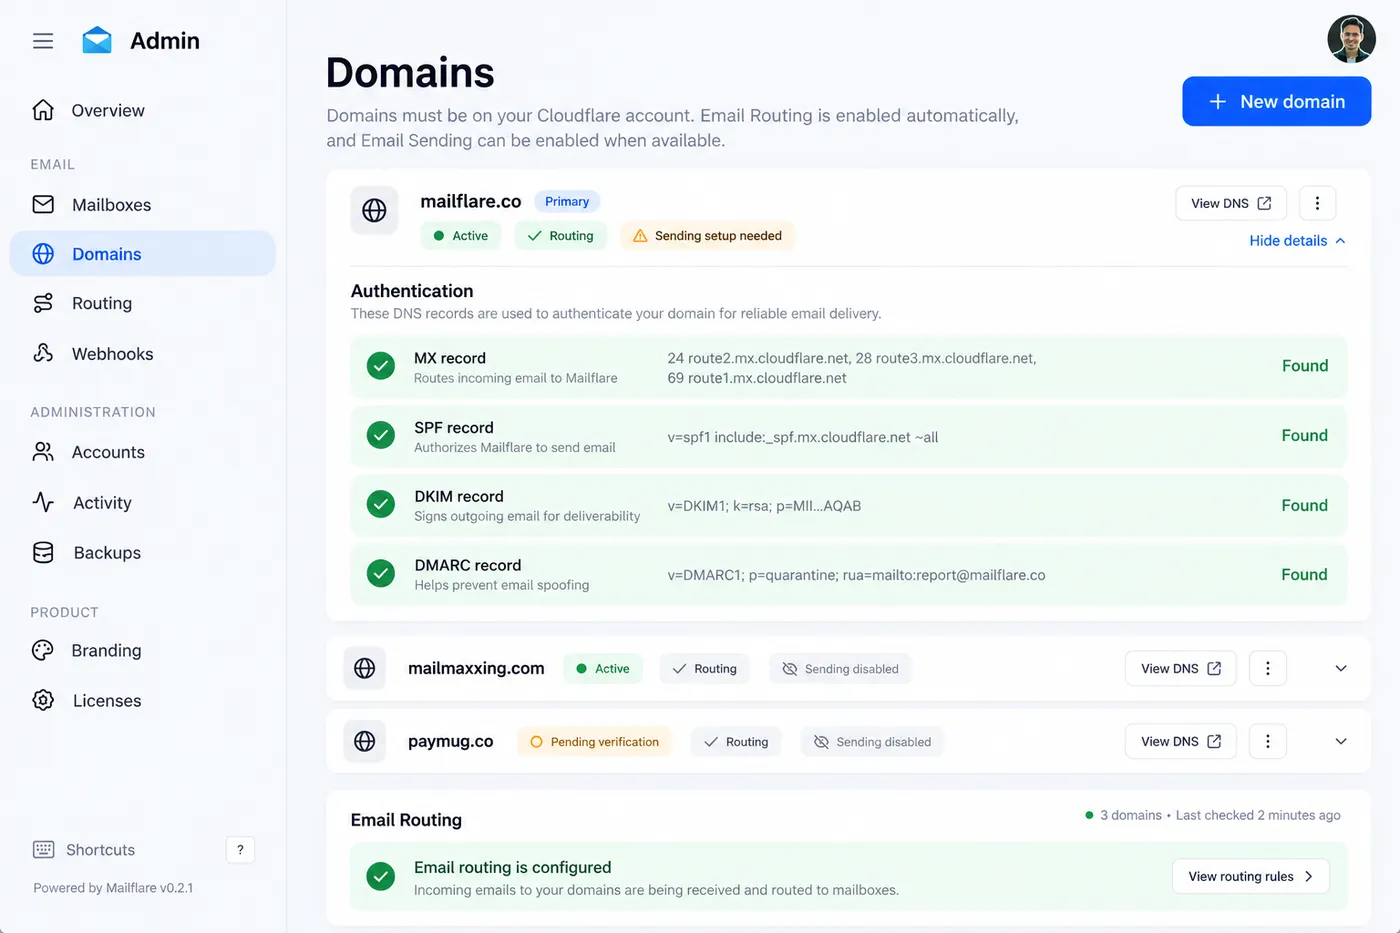
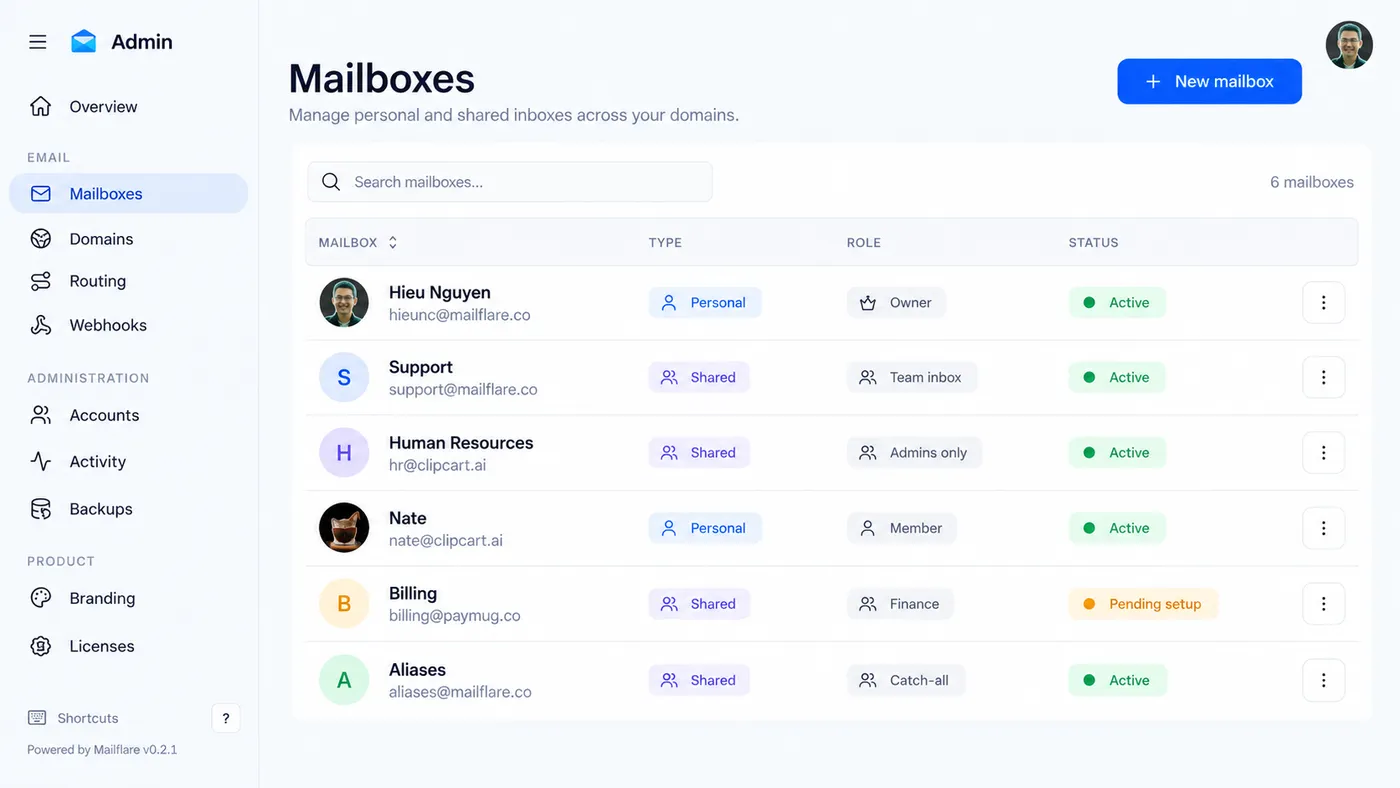
That is the flow in the deployment guide. Later you add more domains from Admin, Domains, New domain and more addresses from Admin, Mailboxes, New mailbox.
06. DNS: the records that keep you out of spam
Steps 5 and 6 in the table
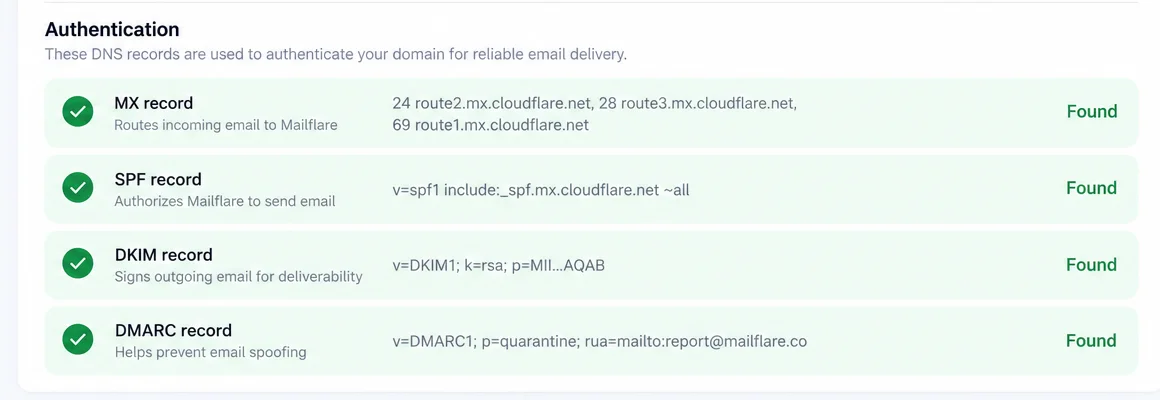
Four DNS records decide whether Gmail and others trust mail from your domain. When Cloudflare handles your DNS, Mailflare writes them for you, and its Domains screen checks the public DNS and shows each as found or missing.
| Record | What it does | What it looks like |
|---|---|---|
| MX | Routes incoming email to Mailflare. | Three route1, route2, route3 .mx.cloudflare.net hosts with priorities. |
| SPF | Lists who may send mail for your domain. | A TXT record, for example v=spf1 include:_spf.mx.cloudflare.net ~all. |
| DKIM | Signs outgoing mail so it can be proved genuine. | A TXT record at <selector>._domainkey.yourdomain.com starting v=DKIM1; k=rsa; p=. |
| DMARC | Tells receivers what to do with mail that fails SPF and DKIM, and where to send reports. | A TXT record at _dmarc.yourdomain.com, for example v=DMARC1; p=quarantine; rua=mailto:.... |
The "What it does" lines follow the app's own labels for each row. The example values are from the repo's official screenshot below. Yours will differ in selector and report address.
Receiving: Cloudflare Email Routing
Email Routing is the free part. It only works when your domain uses Cloudflare DNS, and Cloudflare says DNS changes usually settle in 5 to 15 minutes and can take up to 24 hours (Cloudflare docs). Mailflare turns it on when you add the domain.
Sending: pick one provider per domain
Open Admin, Domains, expand your domain and use Setup sending email. Each provider is a card with a switch. Selecting a provider does not change DNS, its Setup button does. The providers page covers all three:
- Resend (the free route). Make an API key at resend.com/api-keys. A full-access key lets Mailflare add the domain to Resend, write its DNS records and verify it. A sending-only key cannot, so you would add the domain and records by hand. Verification can sit on "pending" for a few minutes. Press Check status before you change anything.
- Cloudflare sending. Needs the paid Workers plan. After your token is set, go to Compute, Email Service, Email Sending in Cloudflare and onboard the domain. Then in Mailflare, expand the domain under Admin, Domains and set up DKIM and DMARC.
- Amazon SES. Needs an IAM key. New accounts start in the SES sandbox, so you can only mail verified addresses until you ask AWS for production access.
Good to know: with Resend, the SPF record lives on a Resend subdomain such as send.yourdomain.com, not on the main domain. Mailflare's checker looks there for you.
The existing MX warning
Only one service can own your domain's MX records. If your domain currently uses Google Workspace, Mailflare shows the old records and asks you to confirm. Confirming deletes them and points incoming mail at Cloudflare, so Google stops receiving mail for that domain. That is why the order matters: import your Gmail first (next section), test, and confirm the switch last. This is Cloudflare error 2008 in the troubleshooting page.
Test it with a real Gmail address
- Send a message from [email protected] to a Gmail address.
- In Gmail, open it, choose More, then Show original (Google's steps).
- Look for SPF, DKIM and DMARC at the top. You want all three to pass.
Mailflare also shows these results for mail you receive, in each message's details. Four green records are the base. A brand new domain with no sending history can still land in spam at first, so send to real people you know early.
07. Move your Gmail over
Steps 7 and 8 in the table
Mailflare can import your old mail so you do not start from zero. In the app, open Settings, then Import and pick a mailbox first. There are three sources.
| Source | Best for | Catch |
|---|---|---|
| Google Takeout (.zip) | Moving a whole Gmail account. My first pick. | Google has to build the archive first. |
| IMAP | Pulling mail straight from Gmail or any other mail host. | Gmail needs an app password, which Google does not recommend. |
| Backup File (.eml or .mbox) | Exports from other tools. | Everything lands in the one section you pick. |
Route 1: Google Takeout
- Open Google Takeout while signed in to the Gmail account (Google's download your data page has the steps).
- Untick everything except Mail. If you only want some labels, use the button under Mail to pick them.
- Choose Next step, set delivery to Send download link via email, and select Create export.
- When Google emails you, select Download archive.
- In Mailflare, go to Settings, Import, choose Google Takeout (.zip) and select the .zip file, or the .mbox inside it.
- Choose your options, press Preview to see the count, then Import.
Options in the app: Create folders from Gmail labels, Skip spam, Skip trash, and Labels to ignore (comma separated, and a trailing / also ignores everything below a label). The file is read in your browser and only the messages are uploaded. Keep the tab open. If it stops, choose the same files again and it continues where it left off.
Route 2: IMAP
- In Settings, Import, choose IMAP and fill in the host (
imap.gmail.com), the port (993) and leave Use TLS on. - Username is your full Gmail address. For the password, Gmail needs an app password.
- Pick the sections to bring over. Folders are found on the Gmail side and matched to new or existing Mailflare folders. Choose Import all messages (newest first, in batches) or set a limit.
Google says app passwords need 2-Step Verification and are not recommended, and that Gmail no longer supports sign-ins with your normal password in other apps (Google's note). If Gmail refuses the login, use Takeout instead. IMAP imports run on the server as a background job, so you can leave the page and follow progress under Imports.
Route 3: .eml and .mbox files
Choose Backup File and select the exported files. The app warns that file exports do not reliably say which folder a message came from, so the files import once into the section you choose. The import text in the app also mentions an upload limit of 100 messages and 25 MB, so for a big mailbox use Takeout or IMAP.
What carries over, and what does not
- Imported: your messages, folders built from Gmail labels, and read state guessed from the headers (per the 0.5.3 release notes). Duplicates by message ID are skipped.
- Skipped: messages over 24 MB, and spam or trash if you ticked those boxes. The app tells you how many.
- Not mentioned in the docs: Gmail filters, signatures and settings. Write those down and rebuild them.
Do it in this order so nothing is lost
- Deploy, create hello@, and check the four DNS rows.
- Run the import and look through the imported mail.
- Send and receive a test with a Gmail address.
- Only then confirm the MX switch, and cancel Google Workspace last.
08. What you get once it runs
This is the list from the reel, each with the source and the honest detail.
Unlimited domains and addresses, plus a catch-all
Mailflare lists unlimited domains and aliases with no per-user fee (mailflare.co). Add a domain, then add as many mailboxes and aliases as you want. A catch-all (*) sends anything@yourdomain to one inbox, and the site says it never shadows your real mailboxes. Routing rules can store, forward, reject or sort mail into folders. Shared mailboxes with roles are the part that needs the Team licence.
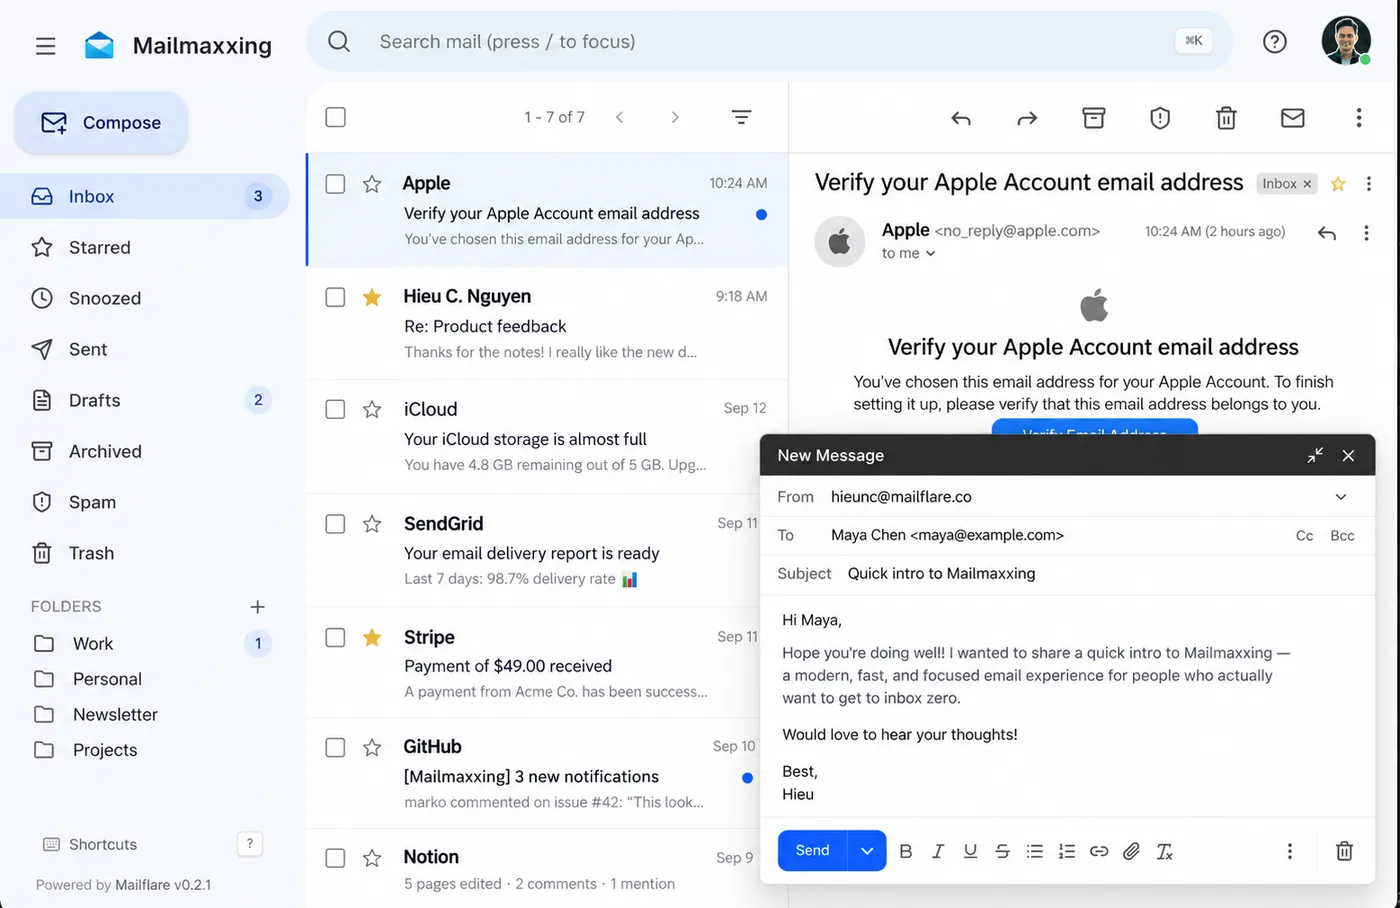
AI that searches your mail and drafts replies
Set the AI provider in Admin, Agent. It supports Cloudflare Workers AI or any OpenAI-compatible provider. Then in the inbox open Assistant, Settings for a mailbox, pick a reviewer and switch it on. It can search conversations and draft replies. Auto-drafting is a separate opt-in, and a person must open the draft and confirm the exact text before anything is sent (assistant docs). The AI is yours to pay for if your provider charges.
An MCP server for Claude: find a free slot
Mailflare has an MCP server, so Claude can read your mail and calendar. To connect:
- In Mailflare, open Settings, API keys, create a key and switch on Allow MCP access.
- Choose which mailboxes and tools it may use. The key is shown once.
- Connect your client to
https://<your-mailflare-origin>/mcpwith anAuthorization: Bearer <key>header.
For Claude Code, the MCP docs show this form for an HTTP server with a bearer token. Swap in your own address, and paste the key yourself:
claude mcp add --transport http mailflare https://mail.yourdomain.com/mcp \
--header "Authorization: Bearer YOUR_MCP_KEY"- Calendar tools include
find_free_time,create_event,search_eventsandget_schedule. Calendar access has separate read and manage permissions. - The key is limited to the mailboxes you pick.
request_sendonly creates a review link, so sending still needs your confirmation in Mailflare. - Calendar writes through MCP save immediately and do not send invitations, per the docs.
Undo send, snooze and follow-up reminders
The inbox holds outgoing mail for up to 30 seconds so you can undo it, can schedule a send, snooze a message, and reminds you when a sent mail has had no reply. Read receipts exist but are opt-in (mailflare.co and the 0.5.3 notes). Set the undo window in your account settings.
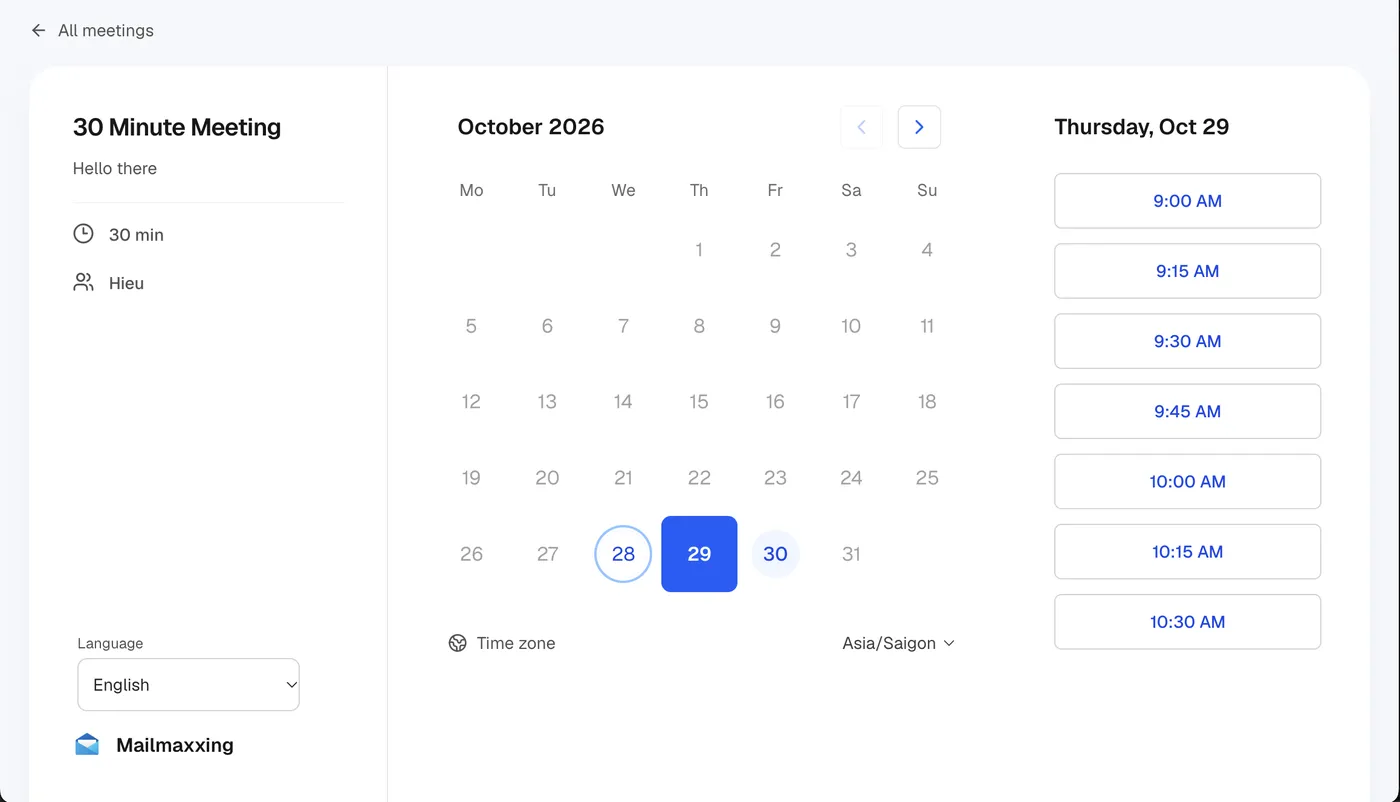
A booking page that replaces Calendly
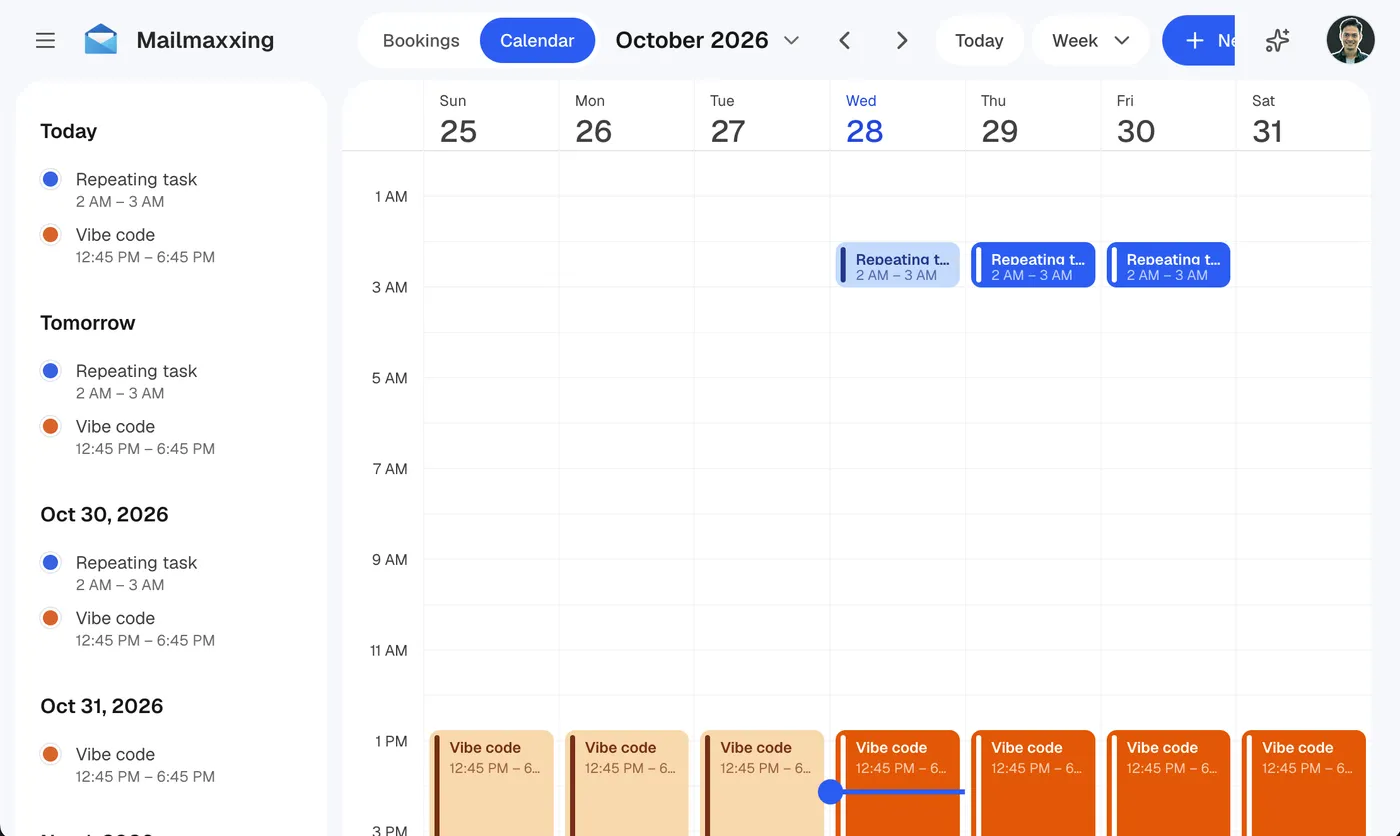
Share a public booking link and people pick a free slot on your calendar, in their own time zone and language. The calendar has repeating events, time zones and email invitations to attendees. If you pay for Calendly only to share a booking link, this covers that.
A drive, and the rest
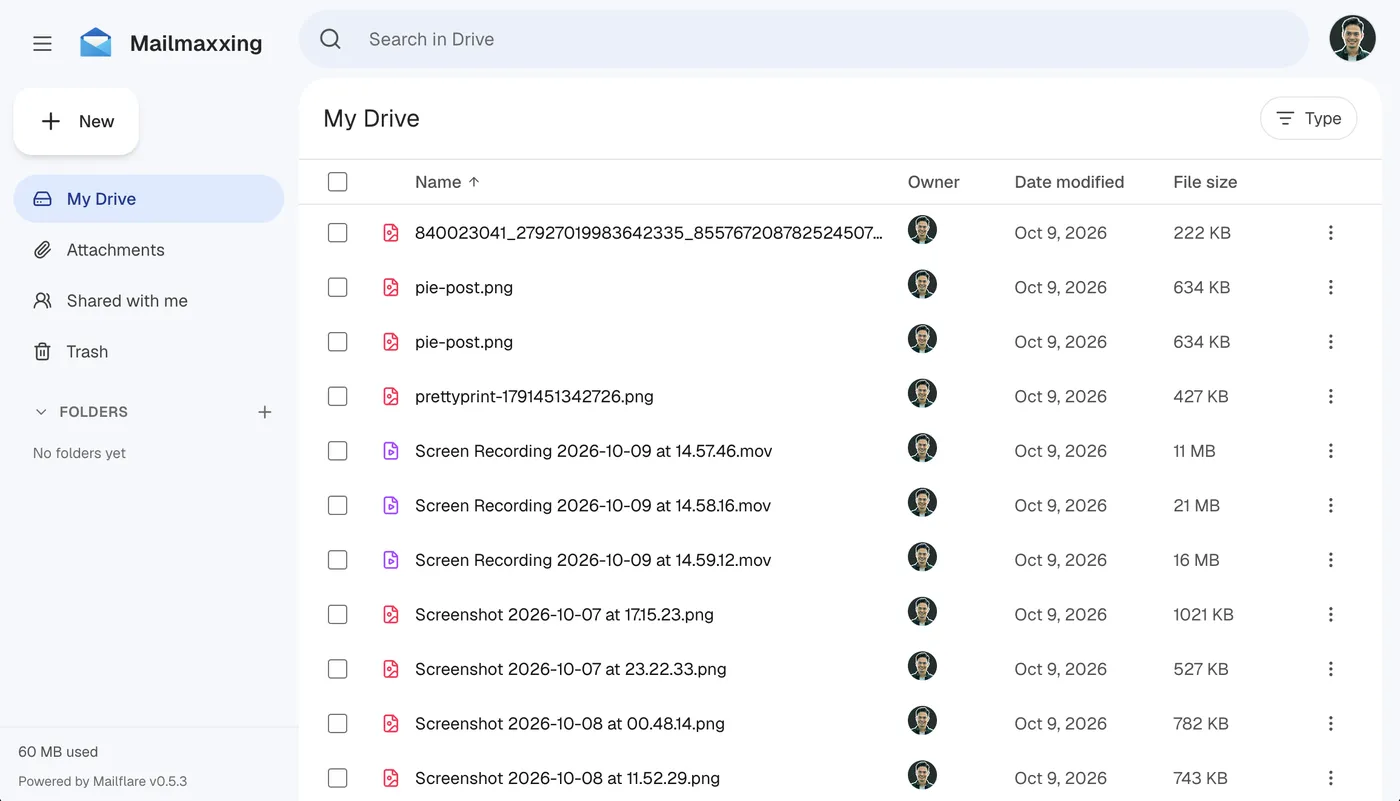
- Drive. Upload, organise and share files. They sit in your own R2, Backblaze B2 or AWS S3 bucket.
- Spam filter. It checks SPF, DKIM and DMARC and learns from your Report spam clicks. Score 70 or higher goes to Spam, 40 to 69 stays in the inbox as suspicious, and message bodies are not sent to any outside service (spam docs). Optional Spamhaus and URLhaus lookups need your own keys.
- Admin. Two-factor sign-in, API keys, webhooks, audit logs and scheduled backups.
- Languages and apps. 34 interface languages, including Hindi, Marathi, Tamil, Telugu and Bengali. There is a native macOS app, and the mail server speaks JMAP. Mobile apps are listed as coming soon on the site.
09. Not on Cloudflare? Docker and other databases
You do not have to use Cloudflare to host it. Mailflare runs as one Docker container on any server, with SQLite and local files by default.
git clone https://github.com/hieunc229/mailflare && cd mailflare
cp .env.docker.example .env.docker
docker compose up -d --build
Then open http://your-host:3000/setup. The self-hosting guide adds a few things you should know:
- Port 25 must be reachable for the built-in mail listener, and several cloud providers block it by default. Hetzner and most VPS providers do not.
- Databases: set
DATABASE_URLto use PostgreSQL, MySQL, Turso or a local SQLite file instead of Cloudflare D1. It works with Supabase, Neon, PlanetScale and TiDB (databases page). - Files: Cloudflare R2, Backblaze B2 or AWS S3.
- Sending: any SMTP relay, or Resend or SES per domain. Behind a reverse proxy, set
APP_URLto your public HTTPS address. - DNS: if Mailflare cannot manage your DNS, the domain page lists the MX, SPF and DMARC records to create by hand.
10. Honest limits
- Not end-to-end encrypted. Your mail sits in your own Cloudflare account, readable by the app and by anyone who has access to that account. The repo's security notes also say a deleted attachment still exists in the original message until you delete the whole message.
- A one-developer project. It is built by one developer plus contributors, and it moves fast. Updates are a separate step: the deployment guide covers the Update button and the database update that follows it.
- Setup can take a few tries. A reviewer on Paul O'Brien's blog reported several attempts. Tokens, the Worker name and old MX records cause most of it.
- You are the postmaster. If your tokens expire or the app breaks, nobody at Google fixes it for you.
- Licence. It is AGPL-3.0. Fine for your own mail. Read the licence if you plan to offer it to other people.
11. If something breaks
These are the repo's own troubleshooting answers, shortened.
| What you see | What to do |
|---|---|
| Cloudflare error 9109, invalid access token | The deploy token is not available to the running app. Make the separate runtime token and set it as CF_TOKEN. Use the secret, not the ID, no Bearer, then redeploy. |
| Error 10000 on Email Routing | The token cannot read the zone or manage its DNS and routing rules. Add the missing permissions. |
| Error 2008, existing MX records | Another provider owns the MX. Mailflare asks before replacing them. Confirming stops the old provider receiving. |
| D1 error 7404, database not found | A database ID from another account is in wrangler.jsonc. Use the ID from your own Worker's DB binding. |
| Inbound mail is not arriving | Check the Worker is named mailflare, Email Routing is on, and the mailbox has a routing rule to the Worker. |
| Resend or SES says "not verified" | Wait a few minutes and press Check status. Look for a duplicate TXT record, a proxied CNAME (it must be DNS only), or a record at the wrong name. |
FAQ
Is Mailflare really free?
For one person, mostly yes. Receiving mail is free through Cloudflare Email Routing, and sending is free up to 3,000 emails a month on Resend's free tier, though Resend's pricing page also lists a daily limit of 100 on that plan. Cloudflare's own sending needs the $5 a month Workers plan. You still pay for the domain, and shared team inboxes need the paid Team licence.
How do I set up free email on my own domain with Mailflare?
Create two Cloudflare API tokens (a deploy token and a runtime token called CF_TOKEN), paste the README's Deploy with an AI agent prompt into Claude Code, open the new app's /setup page and create the admin account, then connect a domain that uses Cloudflare DNS and create a mailbox like [email protected].
Which DNS records stop my mail landing in spam?
MX, SPF, DKIM and DMARC. MX routes incoming mail. SPF lists who may send for your domain. DKIM signs outgoing mail. DMARC says what to do with mail that fails the other two. Mailflare writes them for a domain on Cloudflare and its Domains screen shows each as found or missing. They are the base, not a guarantee of inbox placement.
Can I move my old Gmail into Mailflare?
Yes. Settings, Import takes a Google Takeout .zip or .mbox, an IMAP login (Gmail needs an app password), or .eml and .mbox files. Takeout turns Gmail labels into folders and skips messages over 24 MB. Import and check your mail before you switch your MX records, and cancel Google Workspace last.
Do I have to use Cloudflare?
No. Cloudflare Workers is the easiest route, but Mailflare also runs as one Docker container on any server with SQLite, PostgreSQL, MySQL or Turso, and files on R2, Backblaze B2 or S3. For Docker, port 25 must be reachable from the internet, and some cloud providers block it.
How do I connect Claude to my Mailflare inbox?
Create an API key in Settings, switch on Allow MCP access, choose the mailboxes and tools, then add the server to Claude Code with its HTTP transport and a Bearer header pointing at your app's /mcp address. Claude can search mail, draft replies and find free calendar slots. Sending still needs your confirmation in Mailflare.
What are the downsides of Mailflare?
It is not end-to-end encrypted, it is built by one developer plus contributors, and setup can take a few tries. If it breaks, you fix it. Shared inboxes need the Team licence, which is $249 one time.
What I checked, and what I did not
On 14 November 2026 I read the Mailflare README and its docs on deployment, providers, the assistant and MCP, spam protection, security, self-hosting and troubleshooting. I also read parts of the source behind the Domains and Import screens, the Mailflare site and the 0.5.3 release notes. On the other side I read Google's pages on downloading your data, other mail clients, app passwords and full headers, Cloudflare's pages on API tokens, account IDs, Email Routing and Workers pricing, Resend's pricing and the Claude Code MCP docs. GitHub showed 6,176 stars, 1,039 forks and the AGPL-3.0 licence that day.
I did not install or run Mailflare, so I have not seen the app work on my own domain. The screenshots marked Mailflare repo are the repo's official ones. The clips marked from the reel are my own rebuilt mock-ups with a stand-in brand. Prices change, so check each provider before you pay.
More setups like this: Claude MCP setup, MCP servers setup guide, repo launch checklist for Claude Code and claim your business in ChatGPT.
Stop paying Google for one address. Paste the prompt, point your domain at it, and send your first mail from [email protected].
// Free newsletter
I send out guides like this every week
Real setups, real sources, no hype. Drop your email and I'll send you the next one.